
The AeroPress is a versatile brewing method, celebrated for its speed, portability, and ability to produce smooth, rich coffee. It’s a favorite among enthusiasts!
What is an AeroPress?
The AeroPress is a manual coffee maker, distinguished by its simple design and efficient brewing process. It utilizes air pressure to force water through coffee grounds, resulting in a remarkably smooth and flavorful cup. Unlike traditional drip methods, the AeroPress offers greater control over brewing variables like steep time and water temperature.
Initially released in 2005, it quickly gained popularity for its portability and ease of cleaning. The system consists of a chamber, a plunger, and a filter. It’s a remarkably adaptable tool, capable of producing coffee concentrates suitable for Americanos or brews mimicking espresso. The AeroPress truly empowers coffee lovers to experiment and refine their brewing technique.
Why Choose an AeroPress?
Choosing an AeroPress means opting for versatility and control in your coffee brewing. It excels at extracting subtle flavors from light roasts, a feat many other methods struggle with. Its compact size and durability make it ideal for travel, camping, or simply enjoying coffee on the go – the AeroPress Go is particularly suited for this.
Furthermore, the AeroPress is incredibly easy to clean, and its brewing process is remarkably quick. It’s a cost-effective solution for achieving café-quality coffee at home, without the need for expensive equipment. The ability to experiment with different grind sizes and brewing techniques allows for personalized coffee experiences.
Essential Equipment
To begin, you’ll need an AeroPress, a quality coffee grinder (burr grinders are best), and filters – either paper or reusable metal options.
AeroPress Models: Standard vs. Go
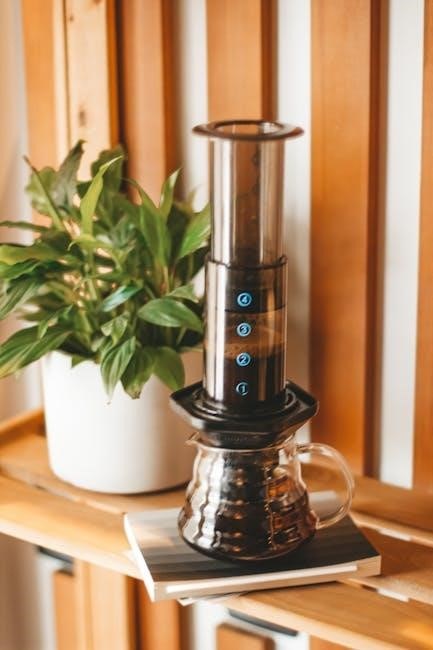
The original AeroPress remains a popular choice, offering a robust build and larger brewing capacity, ideal for those who frequently brew for multiple people. However, the AeroPress Go has gained significant traction due to its exceptional portability. This streamlined version is designed for travel, featuring a compact design where the chamber doubles as a travel mug.
While both models deliver comparable coffee quality, the Go is particularly well-suited for single servings and on-the-go brewing. Consider your lifestyle and typical brewing needs; if portability is paramount, the AeroPress Go is the clear winner. Otherwise, the standard model provides a slightly larger and more durable option.
Coffee Grinder Recommendations
Achieving a consistent grind is crucial for optimal AeroPress brewing. Burr grinders are highly recommended over blade grinders, as they produce a uniform particle size, leading to even extraction and superior flavor. The Opus Conical Burr Grinder is a great all-around choice, capable of handling various grind settings, including those needed for AeroPress.
For dedicated pour-over and AeroPress users, the Ode Brew Grinder Gen 2 offers exceptional grind quality and precision. Investing in a quality grinder significantly elevates your coffee experience, unlocking the full potential of your AeroPress. Remember, consistent grind size is key to reproducible results!
Filters: Paper vs. Metal
AeroPress filters come in two primary types: paper and metal. Paper filters are the standard, providing a clean cup with minimal sediment, and are readily available. They contribute to a brighter, clearer flavor profile by absorbing some oils. Metal filters, conversely, allow more oils and micro-grounds to pass through, resulting in a fuller-bodied, richer brew.
The choice depends on preference. Paper filters are disposable, while metal filters are reusable, making them an eco-friendly option. Experimenting with both allows you to discover which filter best suits your taste and desired coffee characteristics.

The Standard AeroPress Method
This classic technique involves brewing directly into the chamber and pressing through the filter. It’s straightforward, reliable, and delivers a consistently delicious cup of coffee.
Grind Size for AeroPress
Achieving the perfect grind is crucial for optimal AeroPress extraction. Generally, a medium-fine grind works best, resembling table salt. However, experimentation is key to tailoring the brew to your preferences and specific coffee beans. Finer grinds increase extraction, potentially leading to bitterness if over-extracted.
Conversely, coarser grinds result in under-extraction and a weaker, sour taste. The AeroPress’s versatility allows for a wide range of grind sizes, even venturing into espresso-fine for concentrated brews or coarser for longer steep times. Consider your brewing style – inverted or traditional – as it can influence the ideal grind size. Remember, consistent grinding is paramount for reproducible results!
Water Temperature
Water temperature significantly impacts the AeroPress brewing process. While boiling water (212°F / 100°C) is often used, slightly cooler temperatures – around 175-185°F (80-85°C) – can highlight nuanced flavors and reduce bitterness, especially with lighter roasts. Using a thermometer ensures accuracy, but letting boiling water sit for a minute achieves a similar result.
Cooler temperatures are beneficial for delicate coffees, preventing scorching and preserving their aromatic compounds. Experimenting within this range allows you to fine-tune the extraction and discover the sweet spot for your preferred beans. Consistent water temperature is vital for repeatable, delicious AeroPress coffee.
Coffee-to-Water Ratio
Achieving the ideal coffee-to-water ratio is crucial for a balanced AeroPress brew. A common starting point is a 1:15 ratio – for example, 17 grams of coffee to 255 grams of water. However, this is a guideline, and personal preference plays a significant role.
For a stronger, more concentrated brew, reduce the water (e.g., 1:12). A lighter, more delicate cup can be achieved with a higher water ratio (e.g., 1:18). Weighing both coffee and water with a scale ensures consistency. Experimenting with small adjustments will help you dial in the perfect ratio for your beans and taste.
The Inverted Method Explained
The Inverted Method involves placing the plunger into the chamber, creating a sealed brewing environment before adding coffee and water. This prevents dripping during steeping, allowing for a longer, more controlled immersion. Carefully insert the plunger a short distance, then flip the AeroPress onto your mug.
Add your coffee grounds and hot water, stir gently, and steep for your desired time. Once steeping is complete, carefully place a pre-wetted filter into the cap, screw the cap onto the chamber, and swiftly flip the AeroPress onto your mug for pressing.
Steeping Time
Steeping time dramatically impacts the final flavor profile of your AeroPress coffee. Shorter steeps, around 10-15 seconds, tend to produce brighter, more acidic brews, highlighting delicate floral notes. Longer steeps, extending to 60-90 seconds or even more, extract more body and can introduce subtle bitterness.
Experimentation is key! Start with a 30-second steep and adjust based on your preference. Finer grinds generally benefit from shorter steeps, while coarser grinds can handle longer immersion. Remember to consider the roast level of your beans; darker roasts may become bitter with extended steeping.
The Traditional (Upright) Method
This classic technique involves brewing directly in the AeroPress chamber, then pressing the coffee through the filter into your cup—simple and effective!
Assembly and Preparation
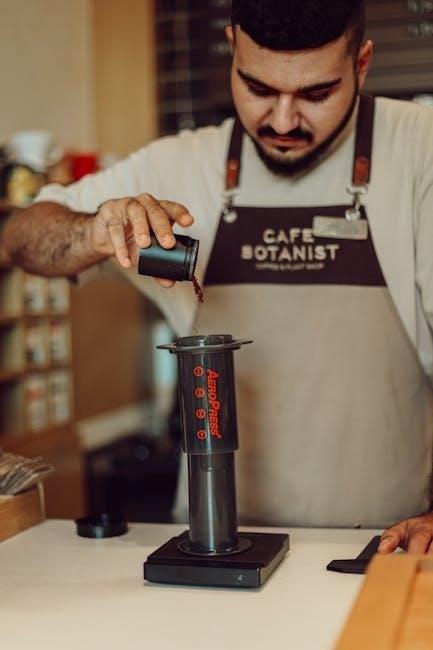
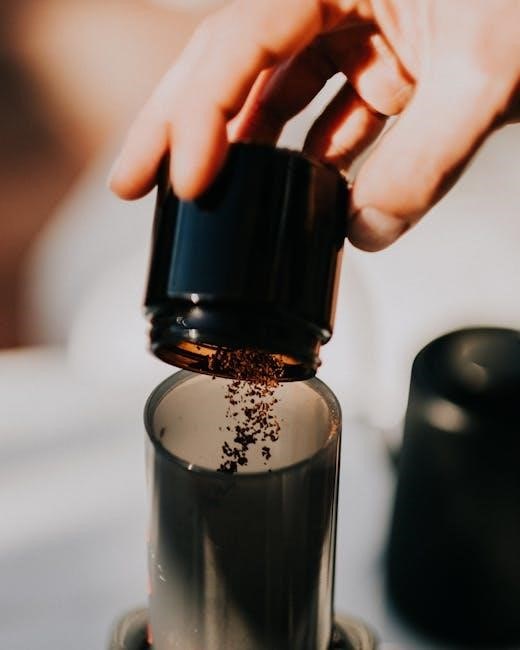
Begin by inserting a paper or metal filter into the AeroPress cap, and then wet the filter with hot water; this eliminates any papery taste and preheats the brewing chamber. Screw the cap onto the chamber securely. Place the AeroPress onto a sturdy mug – ensuring it’s stable! Add your desired amount of finely-ground coffee into the chamber.
Next, carefully pour hot water (temperature is crucial, see later sections) over the grounds, ensuring all coffee is saturated. Gently stir for about ten seconds to promote even extraction. Now, insert the plunger into the chamber, creating a seal, but don’t press down yet – you’re ready for the brewing process!
Plunging Technique
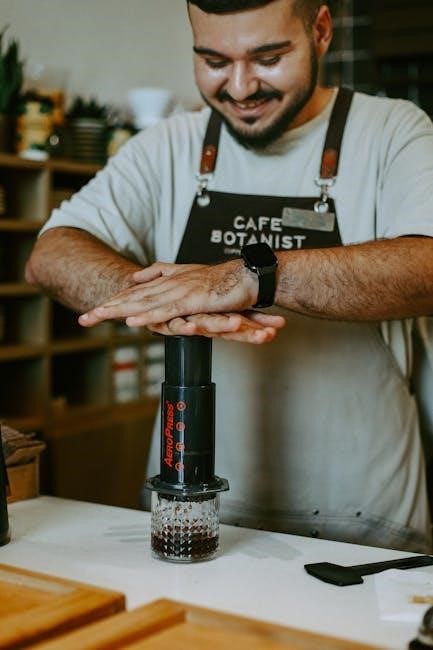
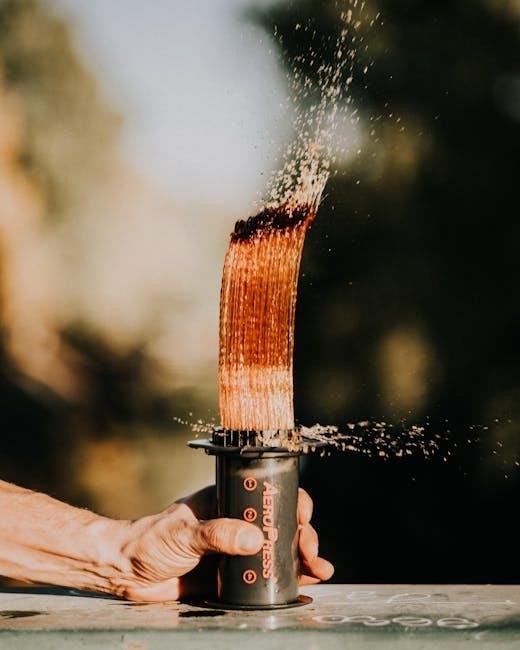
Begin the plunge with slow, steady, and even pressure. Avoid forcing the plunger down too quickly, as this can result in a bitter taste and potentially spray hot coffee. Aim for a consistent rate of descent, taking approximately 20-30 seconds to complete the plunge.
Listen for a hissing sound – this indicates you’ve reached the end of the extraction. Stop plunging once you hear the hiss to prevent over-extraction. Gently remove the AeroPress from your mug. Your freshly brewed coffee is now ready to enjoy! Experiment with different plunge speeds to fine-tune your brew.
Advanced Techniques
Explore bypass brewing, adjusting grind size, and water quality to unlock nuanced flavors and personalize your AeroPress experience for optimal results.
Bypass Brewing
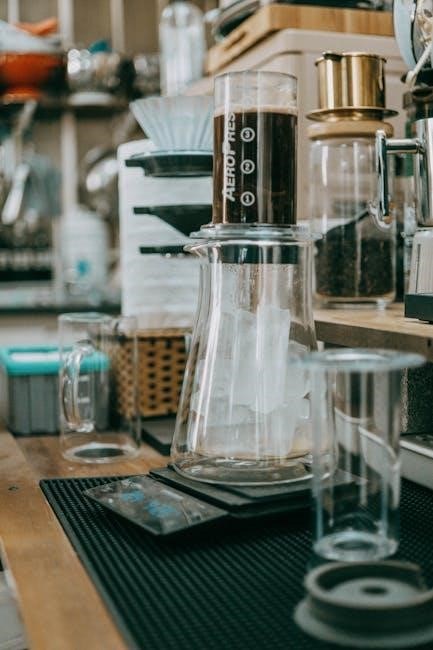
Bypass brewing is a fascinating technique that allows for greater control over the strength and flavor profile of your AeroPress coffee. It involves brewing a concentrated coffee – using a smaller amount of water than you ultimately desire in your final cup – and then diluting it with hot water after the brewing process is complete.
This method effectively separates the brewing stage from the dilution stage, offering a unique level of customization. By adjusting the amount of water used for dilution, you can fine-tune the coffee’s strength to your exact preference. It’s particularly useful for replicating espresso-like strength or creating larger, Americano-style drinks. Experimentation is key to finding your ideal bypass ratio!
Adjusting Grind Size for Flavor
Grind size profoundly impacts the flavor extracted during AeroPress brewing. Finer grinds increase surface area, leading to greater extraction and a bolder, potentially more bitter, cup. Conversely, coarser grinds reduce extraction, resulting in a lighter, potentially sour, brew.
For a balanced flavor, a medium-fine grind – similar to table salt – is a good starting point. If your coffee tastes weak or sour, try a slightly finer grind. If it’s bitter, opt for a coarser grind. Remember that different coffees respond differently, so experimentation is crucial. Consider the roast level too; darker roasts often benefit from a coarser grind to avoid over-extraction.
Water Quality and its Impact
Water quality is a surprisingly significant factor in AeroPress brewing, often overlooked. Since coffee is 98% water, its composition directly influences the final taste. Filtered water is highly recommended, as tap water can contain minerals and chemicals that negatively affect the coffee’s flavor profile.
Avoid distilled water, as it lacks the minerals needed for optimal extraction. Ideally, use water with a balanced mineral content – often described as “soft” or “medium” hardness. The temperature of the water is also crucial, typically between 175-185°F (80-85°C) for best results, enhancing flavor without scorching the grounds.
Cleaning and Maintenance
Regular cleaning ensures longevity and optimal performance. Disassemble the AeroPress after each use, washing all parts with warm, soapy water for a fresh brew.
Disassembly and Washing
Disassembling your AeroPress is remarkably straightforward, contributing to its ease of maintenance. Begin by ejecting the used coffee puck by pressing the plunger fully through the chamber. Separate the chamber from the filter cap, and then detach the plunger from the chamber. Rinse each component thoroughly under warm running water, ensuring all coffee grounds are removed.
For a deeper clean, especially if oils have accumulated, use a mild dish soap. Pay particular attention to the filter cap and the rubber seal on the plunger, as these areas can trap residue. Avoid abrasive cleaners or scouring pads, as they may damage the plastic. Ensure all soap is rinsed away completely before reassembling for your next brewing session.
Filter Disposal
Proper filter disposal is a key part of AeroPress maintenance. Used paper filters are typically compostable, offering an environmentally friendly option, assuming your local composting system accepts paper products. If composting isn’t available, dispose of the used filters in your regular trash receptacle.
Metal filters, a reusable alternative, require a different approach. Simply rinse the metal filter thoroughly under running water to remove any remaining coffee grounds. A small brush can be helpful for stubborn particles. Allow the filter to air dry completely before storing it with your AeroPress. Reusable filters eliminate paper waste and offer a consistent filtration experience.
Troubleshooting Common Issues
Facing problems? A stuck plunger often means the grind is too fine. Weak or bitter coffee usually indicates an incorrect coffee-to-water ratio or steep time.
Stuck Plunger
Encountering a stubbornly stuck plunger? This is a common issue, and thankfully, usually easily resolved. The primary culprit is almost always the grind size being too fine for the AeroPress. Extremely fine grounds create significant resistance, making it difficult to press down. Try using a coarser grind setting on your coffee grinder.
If the plunger remains stuck even after adjusting the grind, gently tap the sides of the AeroPress chamber. Avoid excessive force, as this could damage the device. You can also try slightly loosening the chamber from the base to release some pressure. Remember to always prioritize a consistent grind for optimal performance and prevent future sticking issues.
Weak or Bitter Coffee
Is your AeroPress brew falling flat or tasting unpleasant? Weak coffee often indicates insufficient coffee grounds or too much water. Increase the coffee-to-water ratio, experimenting with slightly more coffee for a bolder flavor. Conversely, bitter coffee usually stems from over-extraction – using too fine a grind, water that’s too hot, or an excessively long steeping time.
Adjust your grind to a coarser setting, lower the water temperature slightly, or shorten the steeping duration. Water quality also plays a role; filtered water is recommended. Reproducible results require weighing beans and water, ensuring consistency with each brew.
AeroPress Recipes
Explore diverse flavors! From classic, balanced brews to concentrated espresso-style shots, the AeroPress adapts to your preferences with simple adjustments and techniques.
Classic AeroPress Recipe
For a consistently delicious cup, begin with 17 grams of finely-ground coffee. Heat 200ml of water to around 175°F (80°C). Add the coffee to the AeroPress chamber, then pour in the hot water, ensuring all grounds are saturated. Stir gently for ten seconds to promote even extraction.
Allow the coffee to steep for one minute before slowly pressing the plunger down, applying steady pressure. This should take approximately 20-30 seconds. Stop pressing when you hear a hissing sound. Dilute the concentrated brew with hot water to your desired strength – typically a 1:1 ratio. Enjoy the smooth, flavorful result!
Espresso-Style AeroPress Recipe
To mimic espresso, use a finer grind – similar to that for espresso machines – and a reduced water ratio. Start with 15 grams of coffee and 60ml of water heated to 185°F (85°C). The inverted method is highly recommended for this technique, preventing drips during steeping.
Steep for 30-45 seconds, then firmly and quickly press the plunger down. Aim for a pressing time of 15-20 seconds. This creates a concentrated, intense brew. Dilute with a small amount of hot water if desired, but the goal is a robust, espresso-like shot perfect for lattes or enjoying neat!
Resources and Further Learning
Explore online communities and forums dedicated to AeroPress brewing for tips, recipes, and troubleshooting advice from fellow coffee lovers and experts.
Online Communities and Forums
Dive into the vibrant world of AeroPress enthusiasts online! Numerous communities and forums offer a wealth of knowledge, shared experiences, and innovative brewing techniques. These platforms are invaluable resources for both beginners and seasoned AeroPress users. Connect with fellow coffee lovers to discuss recipes, troubleshoot issues, and discover new ways to optimize your brew.
Explore dedicated Reddit communities, Facebook groups, and specialized AeroPress forums. Many websites also host comment sections where users share their insights and ask questions. Don’t hesitate to participate, ask for advice, and contribute your own discoveries to the collective knowledge base. Learning from others is a fantastic way to elevate your AeroPress game!
Recommended AeroPress Accessories
Enhance your AeroPress experience with a few key accessories! A quality burr grinder, like the Opus Conical Burr Grinder or Ode Brew Grinder Gen 2, ensures consistent grind size for optimal extraction. A digital scale is crucial for precise coffee-to-water ratios, leading to reproducible results. Consider the Hario V60 filters for alternative filtration options.
For portability, the AeroPress Go travel mug is a fantastic addition. Explore various stirring paddles and tampers for improved brewing control. Protective carrying cases safeguard your AeroPress during travel. Don’t underestimate the value of a good kettle with temperature control for consistent water heating. These accessories elevate your brewing process!
No Responses